How to Compress an Image Without Losing Quality
You spent hours perfecting a product photo. The lighting is perfect, the colors are rich, and the composition is flawless. Then you try to upload it to your website and the page speed drops to a crawl. Or you try to email it to a client and hit a strict 25MB attachment limit with just a single image.
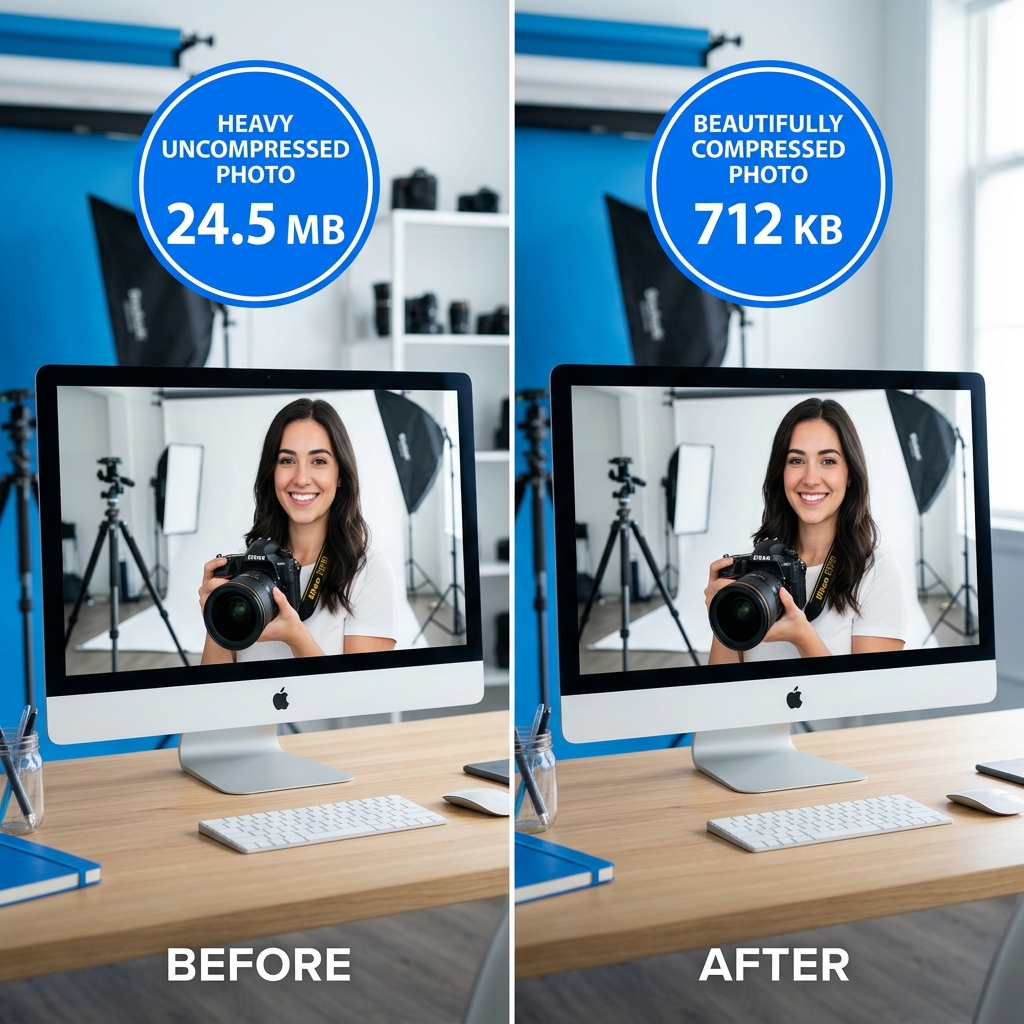
These scenarios are incredibly frustrating but entirely preventable. Uncompressed images are the number one cause of slow websites across the internet. Google PageSpeed Insights, Core Web Vitals algorithms, and real human users all heavily punish slow-loading pages. To fix this bottleneck, you must learn how to properly compress your image files before they ever touch the web or an email client, ensuring they load instantaneously without sacrificing the visual fidelity you worked so hard to achieve.
What is Image Compression?
Before diving into the optimization process, it is important to understand what is actually happening when you compress a file. Compression generally falls into two distinct categories: lossy and lossless.
Lossy compression (most commonly associated with the JPG format) permanently removes specific pixel data from the file to reduce the overall size. While the word "lossy" sounds destructive, modern compression algorithms are incredibly sophisticated. When applied correctly (typically at a quality setting of 80 or above), the human eye physically cannot detect the missing pixels. The visual difference is imperceptible, yet the file size drops dramatically.
Lossless compression (typically associated with the PNG format) operates differently. It removes redundant metadata and invisible background information without touching the actual visible pixel data. Because no visual data is discarded, there is absolutely zero quality change, though the resulting file size reduction is not as extreme as a lossy format.
The most critical insight to remember is this: most "uncompressed" images coming straight from digital cameras or modern smartphones contain massive amounts of invisible, redundant data. This bloated data can be safely removed with zero visible impact on the final photograph.
Lossy vs Lossless Comparison Table
Here is a simple breakdown of how different compression methods and file formats perform:
| Method | Format | Quality Loss | File Size Reduction | Best For |
|---|---|---|---|---|
| Lossy | JPG, WebP | Minimal at 80%+ quality | 60-85% | Photos, complex backgrounds |
| Lossless | PNG, WebP | None | 20-40% | Logos, vectors, icons, text |
| Conversion | PNG→JPG | Slight | Up to 90% | Complex photos mistakenly saved as PNG |
| Modern codec | WebP | None vs JPG | 25-35% smaller than JPG | Web images, modern browsers |
Why Image File Size Matters
Ignoring image compression has severe, real-world consequences for your digital presence. Here is exactly why you need to care about the size of your files:
Google Core Web Vitals directly measure user experience metrics, and one of the most critical is LCP (Largest Contentful Paint). This metric tracks how long it takes for the largest visual element on a screen—which is almost always a hero image—to finish rendering. Large, uncompressed images guarantee a poor LCP score, which directly translates to a lower Google search ranking.
Email limitations also pose a significant hurdle. Gmail enforces a strict 25MB limit on standard attachments, while Outlook caps at 20MB. A single RAW photo or uncompressed high-resolution PNG can easily exceed this limit, preventing your message from sending.
When uploading to social media networks, the platforms will automatically apply their own aggressive compression algorithms. If you upload a massive 15MB file, the platform's servers will crush it to fit their limits, often creating ugly "double-compression" artifacts. It is always better to compress the file yourself first so you retain control over the final visual quality.
Finally, consider storage costs and mobile data limits. Storing 1,000 uncompressed product photos at 5MB each consumes 5GB of costly server space. If those same photos are compressed to 500KB each, they consume merely 500MB. Furthermore, users browsing your site on mobile devices are often paying for every megabyte of data they download. Heavy, bloated websites frustrate mobile users, leading to sky-high bounce rates and abandoned shopping carts.
How to Compress Images Without Losing Quality
Achieving the perfect balance between a tiny file size and pristine visual quality is easy when you use a secure, browser-based tool.
Here is the step-by-step process using the NoStorePDF Image Compressor:
- Open the Tool: Navigate directly to the Image Compressor page at NoStorePDF.
- Select Your Files: Drag and drop your JPG, PNG, or WebP images into the drop zone. The tool supports batch processing, meaning you can drop multiple files in simultaneously.
- Verify Local Processing: The tool instantly loads your images locally into your browser's memory. There is zero upload happening and zero third-party server involvement, ensuring complete privacy.
- Adjust the Quality Slider: Dial in your compression settings. For standard photographs, start at 85%. If the image is strictly for web use, try dropping it to 75%.
- Preview the Results: Check the before-and-after visual comparison provided by the tool. Confirm that the visual quality remains acceptable to your eye.
- Review the Stats: Look at the compression statistics. The tool will display the original uncompressed size, the new compressed size, and the total percentage of data saved.
- Download the File: Click the download button. Your newly optimized, lightweight image is ready to be published.
Special Note for PNGs: If you are compressing a PNG file that contains sharp text, a logo, or vector graphics, ensure you utilize the lossless mode to preserve those crisp edges. However, for maximum web compression, if you realize your PNG is actually a full-color photograph, you should convert it to a JPG using a PNG to JPG converter first, and then compress it. This format correction alone can reduce the overall file size by up to 90%.
What Quality Setting Should You Use?
Choosing the right number on the quality slider can be confusing. Use this practical guide to hit the perfect sweet spot for your specific use case:
- 90-100%: Reserved strictly for professional archiving, fine art printing, or high-end photography portfolios. These files will remain quite large and are not suitable for standard web design.
- 80-85%: The ultimate sweet spot. Use this range for website hero images, detailed e-commerce product photos, and professional headshots. The quality loss is imperceptible to the human eye, yet the file size reduction is massive.
- 70-75%: Perfect for standard blog thumbnails, supporting article images, and social media sharing. If you zoom in heavily, you may see slight changes, but it is perfectly fine for standard screen displays.
- Below 70%: Generally avoid dropping below this threshold. This is where visible artifacts, blocky edges, and color banding begin to appear, making your content look amateurish.
Pro Tip: Setting the quality to 82 on a standard JPG typically produces results that look entirely identical to a quality setting of 95 in most modern image viewers. The visual difference is literally invisible, but the resulting file size drops by nearly 40%.
Format Matters as Much as Compression
The biggest mistake people make in image optimization is compressing a file that is saved in the wrong format to begin with. The most common error is using PNG for complex photographs.
If your PNG is a photo of a landscape or a person (and does not require a transparent background), you are wasting an enormous amount of data. Convert that file to a JPG first, and then compress it.
If you are optimizing images specifically for a modern website, you should upgrade your workflow to use the WebP format. Convert your old JPG files using a JPG to WebP converter. WebP is a modern image format that provides superior lossless and lossy compression. A WebP file is typically 25-35% smaller than a comparable JPG image at the exact same quality setting. Because WebP is now natively supported by all modern web browsers (including Chrome, Firefox, Safari, and Edge), there is absolutely no reason not to utilize it for your web assets.
If you ever need to reverse the process for an older legacy system, you can always use a secure WebP to JPG tool to revert the file.
Pro Tips
To master your media management, integrate these final professional tips into your daily workflow:
- Protect the Original: Always keep your original, uncompressed high-resolution file in a secure archive. Only compress a copy of the file for web use, never overwrite the master original.
- Resize Before You Compress: If you take a 4000-pixel wide photo but your website only displays images at a maximum width of 800 pixels, you are wasting 25 times the necessary pixel data. Use a Resize Image tool to physically scale down the dimensions to match your display size before you apply compression.
- Batch Processing: Stop wasting time optimizing files one by one. Select 20 or 30 product photos and drag them all into the Image Compressor at once to process an entire batch in seconds.
- Target Metrics: As a general rule of thumb, most email clients prefer attachments under 1MB per image, while most fast-loading websites require supporting images to stay strictly under 200KB.
Frequently Asked Questions
What is the best image compression quality setting for websites?
For most website images, a quality setting between 80% and 85% is the perfect sweet spot. It provides massive file size reductions (often 60-80% smaller) while keeping any visual artifacts completely invisible to the human eye on standard screens.
Does compressing an image reduce its dimensions/resolution?
No. Standard image compression algorithms reduce file size by intelligently discarding invisible data or redundant color information, but they do not alter the physical width or height dimensions (the resolution) of the photograph itself.
Should I compress PNG or convert to JPG first?
If the image is a complex photograph with millions of colors, you should definitely convert it to JPG first, then compress it. If the image is a logo, contains sharp text, or requires a transparent background, leave it as a PNG and use lossless compression.
What is the difference between lossy and lossless compression?
Lossy compression permanently removes some pixel data to dramatically reduce file size, though the loss is usually undetectable at high quality settings. Lossless compression removes redundant metadata without touching the visual pixel data at all, resulting in a perfectly identical image but a less dramatic file size reduction.
Does image compression affect SEO?
Yes, it heavily impacts SEO. Search engines like Google use page load speed as a major ranking factor. Large, uncompressed images slow down your page speed and hurt your Core Web Vitals (specifically LCP), which directly lowers your search engine rankings.
Can I compress multiple images at once?
Yes. Advanced browser-based tools allow you to drag and drop dozens of images into the interface simultaneously, allowing you to batch compress entire folders of photos in seconds using your computer's local processing power.
Conclusion
Understanding the mechanics of file formats and proper optimization techniques separates amateur websites from professional digital experiences. Image compression is one of the highest-ROI technical optimizations any website owner, developer, or content creator can make.
By taking just a few seconds to process your media, you guarantee faster page loads, better SEO rankings, and happier users. Take control of your digital assets today by using our completely secure, local Image Compressor directly in your browser.